
在vmware中安装一台虚拟机,操作系统为CentOS6.9 ip地址为 192.168.56.11
要求:
1、xshell能够连接上此虚拟机
2、此虚拟机必须可以上网
3、使用yum安装 httpd
4、启动httpd 启动命令如下
/etc/init.d/httpd start
5、浏览器访问能够看到页面
192.168.56.11
省略
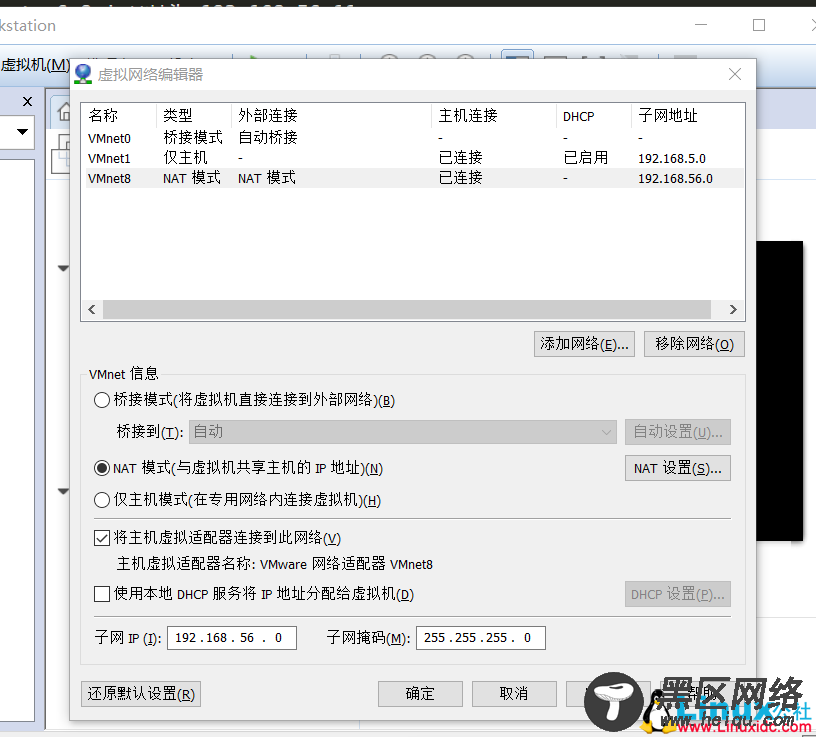
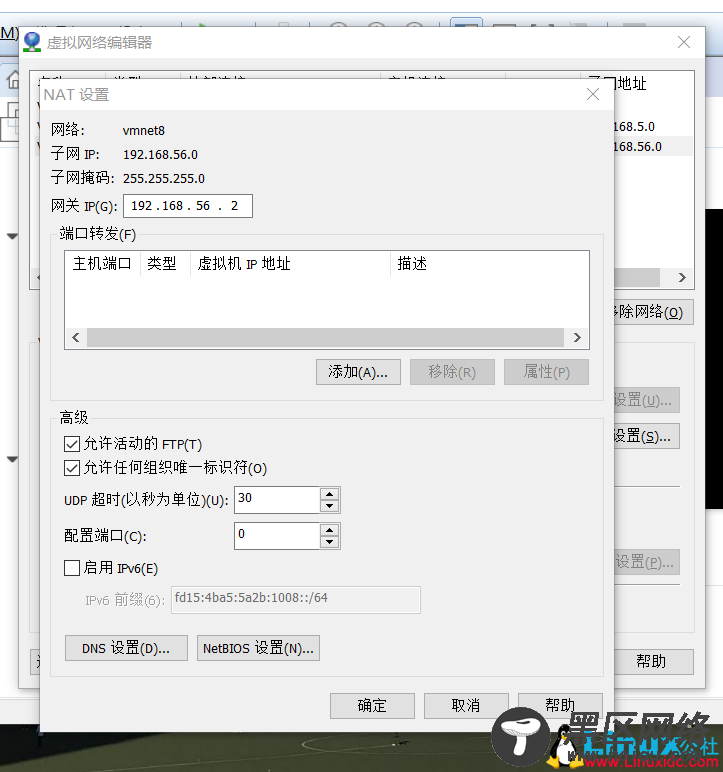
步骤2 - 配置vmware虚拟网络编辑器小题示: 直接以管理员方式打开vmware可以避免每次编辑弹出授权提示
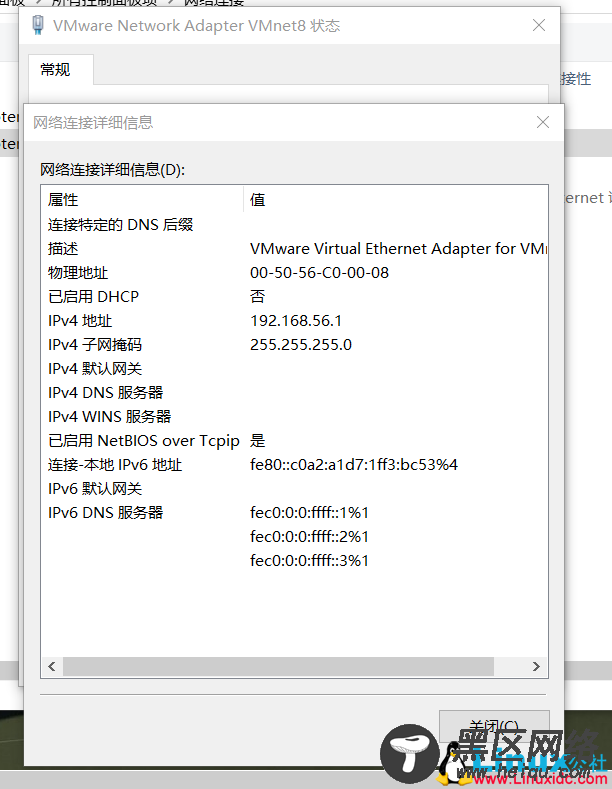
2.1 配置完成前vmnet8虚拟网卡详细信息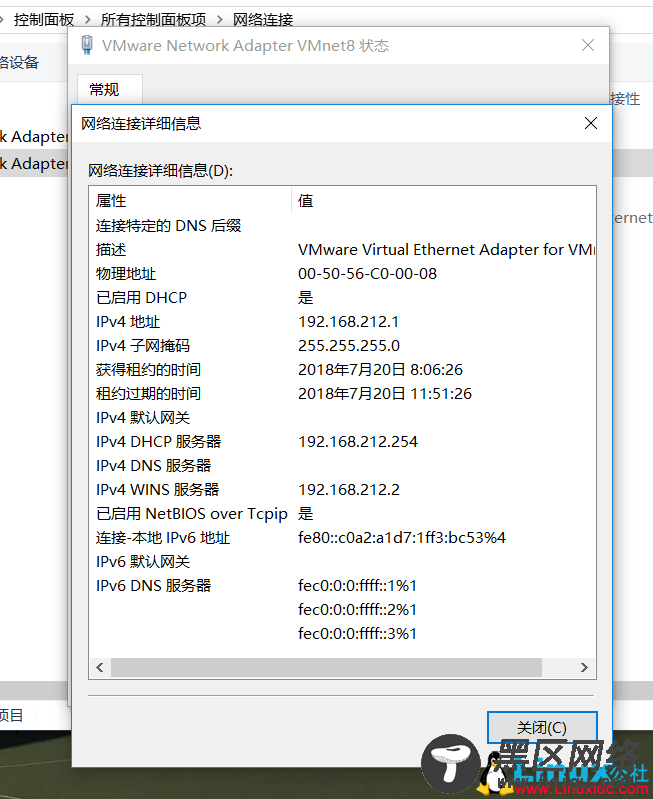
[root@linuxidc ~]# cat /etc/sysconfig/network-scripts/ifcfg-eth0
DEVICE=eth0
HWADDR=00:0c:29:02:4b:f5
TYPE=Ethernet
UUID=beff3b4a-ae43-4ae5-8e85-0c4e42ca3c2e
ONBOOT=yes
NM_CONTROLLED=yes
USERCTL=no
PEERDNS=yes
IPV6INIT=no
BOOTPROTO=static
IPADDR=192.168.56.11
NETMASK=255.255.255.0
GATEWAY=192.168.56.2
不同电脑里面的内容略有不同,其中最后4行,分配IP地址分配方式,IP地址,子网掩码,网关
必不可少。
如果配置完毕后仍不能访问互联网,可考虑添加DNS配置项
步骤4 - 重启网卡检查效果 4.1 重启网卡[root@linuxidc ~]# /etc/init.d/network restart
Shutting down interface eth0: [ OK ]
Shutting down loopback interface: [ OK ]
Bringing up loopback interface: [ OK ]
Bringing up interface eth0: Determining if ip address 192.168.56.11 is already in use for device eth0...
[ OK ]
[root@linuxidc ~]# ip a
1: lo: <LOOPBACK,UP,LOWER_UP> mtu 65536 qdisc noqueue state UNKNOWN
link/loopback 00:00:00:00:00:00 brd 00:00:00:00:00:00
inet 127.0.0.1/8 scope host lo
inet6 ::1/128 scope host
valid_lft forever preferred_lft forever
2: eth0: <BROADCAST,MULTICAST,UP,LOWER_UP> mtu 1500 qdisc pfifo_fast state UP qlen 1000
link/ether 00:0c:29:02:4b:f5 brd ff:ff:ff:ff:ff:ff
inet 192.168.56.11/24 brd 192.168.56.255 scope global eth0
inet6 fe80::20c:29ff:fe02:4bf5/64 scope link
valid_lft forever preferred_lft forever
此时Xshell已经可以正常连接虚拟机
4.3 主机ping虚拟机Microsoft Windows [版本 10.0.17134.137]
linuxidc@linuxidc C:\Users\sheng7k
> ping 192.168.56.11
正在 Ping 192.168.56.11 具有 32 字节的数据:
来自 192.168.56.11 的回复: 字节=32 时间<1ms TTL=64
来自 192.168.56.11 的回复: 字节=32 时间<1ms TTL=64
来自 192.168.56.11 的回复: 字节=32 时间<1ms TTL=64
来自 192.168.56.11 的回复: 字节=32 时间<1ms TTL=64
192.168.56.11 的 Ping 统计信息:
数据包: 已发送 = 4,已接收 = 4,丢失 = 0 (0% 丢失),
往返行程的估计时间(以毫秒为单位):
最短 = 0ms,最长 = 0ms,平均 = 0ms
[root@linuxidc ~]# ping -c3 192.168.21.55
PING 192.168.21.55 (192.168.21.55) 56(84) bytes of data.
64 bytes from 192.168.21.55: icmp_seq=1 ttl=128 time=0.402 ms
64 bytes from 192.168.21.55: icmp_seq=2 ttl=128 time=0.575 ms
64 bytes from 192.168.21.55: icmp_seq=3 ttl=128 time=0.460 ms
--- 192.168.21.55 ping statistics ---
3 packets transmitted, 3 received, 0% packet loss, time 2001ms
rtt min/avg/max/mdev = 0.402/0.479/0.575/0.071 ms
[root@linuxidc ~]# ping -c3 jd.com
PING jd.com (106.39.167.118) 56(84) bytes of data.
64 bytes from 106.39.167.118: icmp_seq=1 ttl=128 time=35.8 ms
64 bytes from 106.39.167.118: icmp_seq=2 ttl=128 time=37.1 ms
64 bytes from 106.39.167.118: icmp_seq=3 ttl=128 time=36.7 ms
--- jd.com ping statistics ---
3 packets transmitted, 3 received, 0% packet loss, time 2039ms
rtt min/avg/max/mdev = 35.855/36.559/37.112/0.568 ms
执行yum -y install httpd,成功安装后将有Complete!提示
启动httpd服务