源码地址:https://gitee.com/fighter3/eshop-project.git
持续更新中……
在上一节里,我们搭建了一个微服务项目的整体架构,并进行了版本控制。
接下来我们进一步来完善架构,引入SpringBoot、MybatisPlus等开发框架,来支撑具体业务的开发。

我们在父项目统一管理引入的jar包的版本。
一般的SpringBoot项目是通过parent方式引入SpringBoott依赖,但是这样一来就违背了单个pom只有一个parent标签的标准。
<parent> <groupId>org.springframework.boot</groupId> <artifactId>spring-boot-starter-parent</artifactId> <version>2.2.2.RELEASE</version> <relativePath/> <!-- lookup parent from repository --> </parent>所以我们采用父项目中以depencyMangement方式引入spring-boot,子项目依赖parent父配置即可。
<!--使用properties统一管理版本--> <properties> <java.version>1.8</java.version> <spring.boot.version>2.2.2.RELEASE</spring.boot.version> </properties> <!--统一管理项目依赖版本--> <dependencyManagement> <dependencies> <dependency> <groupId>org.springframework.boot</groupId> <artifactId>spring-boot-dependencies</artifactId> <version>${spring.boot.version}</version> <type>pom</type> <scope>import</scope> </dependency> </dependencies> </dependencyManagement> 2、引入MybatisPlus关于MybatisPlus的基本使用,基本使用可以查看我的这篇博客:SpringBoot学习笔记(十七:MyBatis-Plus )。
MybatisPlus的官方文档做的也很不错,详细了解可以直接查看官方文档:https://mybatis.plus/
引入MybatisPlus依赖和MySQL驱动依赖:
<mybatis.plus.version>3.4.1</mybatis.plus.version> <!--mybatis-plus依赖--> <dependency> <groupId>com.baomidou</groupId> <artifactId>mybatis-plus-boot-starter</artifactId> <version>${mybatis.plus.version}</version> </dependency> <!--mybatis-plus代码生成器依赖--> <dependency> <groupId>com.baomidou</groupId> <artifactId>mybatis-plus-generator</artifactId> <version>${mybatis.plus.version}</version> </dependency> <!--模板引擎依赖,即使不需要生成模板,也需要引入--> <dependency> <groupId>org.apache.velocity</groupId> <artifactId>velocity-engine-core</artifactId> <version>2.2</version> </dependency> <!--mysql驱动--> <dependency> <groupId>mysql</groupId> <artifactId>mysql-connector-java</artifactId> <scope>runtime</scope> </dependency>为了接口测试的方便,我们还引入了swagger2的增强工具knife4j
<!--knife4j依赖--> <dependency> <groupId>com.github.xiaoymin</groupId> <artifactId>knife4j-spring-boot-starter</artifactId> <version>${knife4j-version}</version> </dependency> 3、使用MP代码生成器接下来我们以用户模块为例,演示MybatisPlus代码生成器的使用。关于代码生成器的更多内容可以直接查看官方文档:https://mybatis.plus/guide/generator.html
在上面我们已经引进行了统一的依赖版本管理,在子模块里还需要引入依赖,不过可以免去版本号。
<dependency> <groupId>org.springframework.boot</groupId> <artifactId>spring-boot-starter</artifactId> </dependency> <dependency> <groupId>com.baomidou</groupId> <artifactId>mybatis-plus-boot-starter</artifactId> </dependency> <dependency> <groupId>org.springframework.boot</groupId> <artifactId>spring-boot-starter-web</artifactId> </dependency> <dependency> <groupId>com.baomidou</groupId> <artifactId>mybatis-plus-generator</artifactId> </dependency> <!--模板引擎依赖,即使不需要生成模板,也需要引入--> <dependency> <groupId>org.apache.velocity</groupId> <artifactId>velocity-engine-core</artifactId> <version>2.2</version> </dependency> <!--mysql驱动--> <dependency> <groupId>mysql</groupId> <artifactId>mysql-connector-java</artifactId> <scope>runtime</scope> </dependency> <dependency> <groupId>com.github.xiaoymin</groupId> <artifactId>knife4j-spring-boot-starter</artifactId> </dependency> <!--lombok--> <dependency> <groupId>org.projectlombok</groupId> <artifactId>lombok</artifactId> <optional>true</optional> </dependency>我们还引入了lombok用来简化代码,使用lombok可以省去生成大量getter/setter代码。在Idea中使用需要安装插件,在插件里自行搜索安装即可。
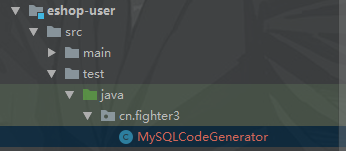
由于代码生成器与业务无关,所以将代码生成类建在测试目录下: