
分享下Ubuntu 16.04+CUDA8.0+Caffe安装教程,CUDA CUDA(Compute Unified Device Architecture),显卡厂商NVidia推出的运算平台。 CUDA是一种由NVIDIA推出的通用并行计算架构,该架构使GPU能够解决复杂的计算问题。 它包含了CUDA指令集架构(ISA)以及GPU内部的并行计算引擎。 开发人员现在可以使用C语言来为CUDA架构编写程序,C语言是应用最广泛的一种高级编程语言。所编写出的程序于是就可以在支持CUDA的处理器上以超高性能运行。
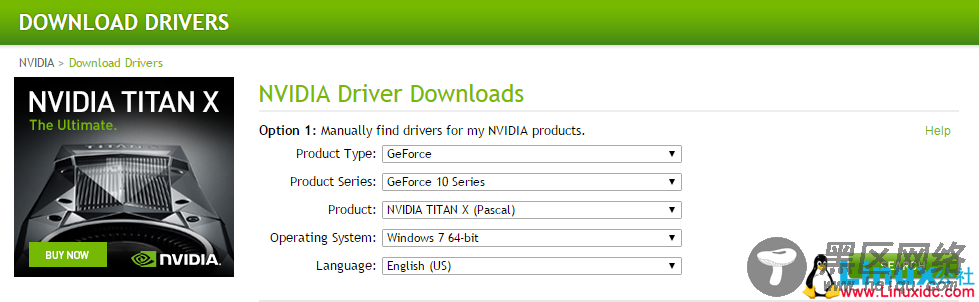
1、安装nvidia驱动首先去官网上查看适合你GPU的驱动(?lang=en-us)
例如,本人的GPU适合的驱动如图:
执行如下语句,安装
sudo add-apt-repository ppa:graphics-drivers/ppa sudo apt-get update sudo apt-get install nvidia-367 sudo apt-get install mesa-common-dev sudo apt-get install freeglut3-dev执行完上述后,重启(reboot)。
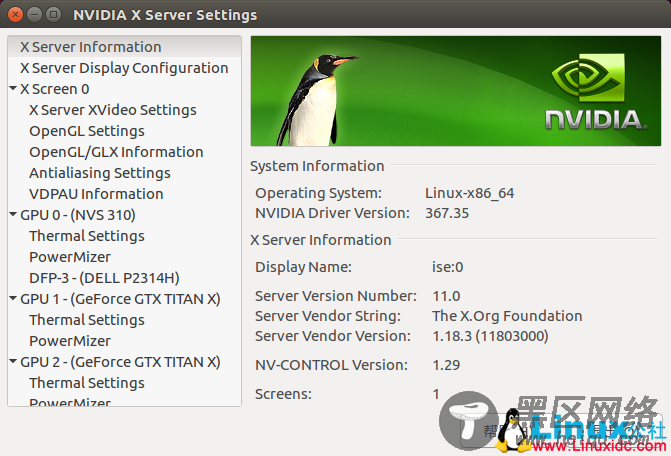
重启后输入:
如果出现了你的GPU列表,则说明驱动安装成功了。另外也可以通过
nvidia-settings查看自己机器上详细的GPU信息,本人机器的信息如下:
cuda是nvidia的编程语言平台,想使用GPU就必须要使用cuda。
从这里下载cuda的安装文件
https://developer.nvidia.com/cuda-release-candidate-download
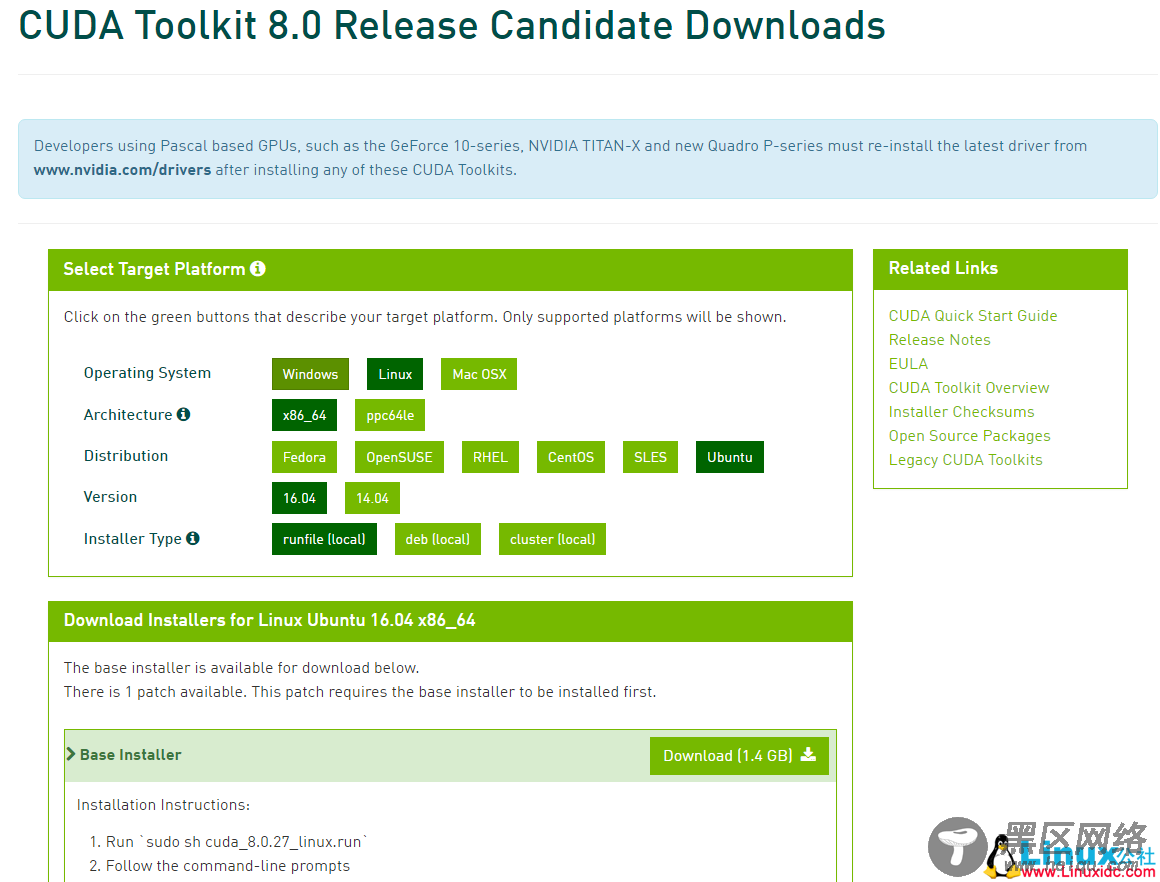
注意这里下载的是cuda8.0的runfile(local)文件。
这里是nvidia给出的官方安装指南(遇到问题时可以查阅):
下载完cuda8.0后,执行如下语句,运行runfile文件: sudo sh cuda_8.0.27_linux.run
执行后会有一系列提示让你确认,但是注意,有个让你选择是否安装nvidia361驱动时,一定要选择否,因为前面我们已经安装了更加新的nvidia367,所以这里不要选择安装。其余的都直接默认或者选择是即可。
安装成功后会出现如下界面:
安装完毕后,再声明一下环境变量,并将其写入到 ~/.bashrc 的尾部:
export PATH=/usr/local/cuda-8.0/bin${PATH:+:${PATH}} export LD_LIBRARY_PATH=/usr/local/cuda-8.0/lib64${LD_LIBRARY_PATH:+:${LD_LIBRARY_PATH}}然后设置环境变量和动态链接库,在命令行输入:
$ sudo gedit /etc/profile在打开的文件末尾加入:
export PATH = /usr/local/cuda/bin:$PATH保存之后,创建链接文件:
sudo gedit /etc/ld.so.conf.d/cuda.conf在打开的文件中添加如下语句:
/usr/local/cuda/lib64然后执行
sudo ldconfig使链接立即生效。
3、测试cuda的Samples cd /usr/local/cuda-7.5/samples/1_Utilities/deviceQuery make sudo ./deviceQuery如果显示的是一些关于GPU的信息,则说明安装成功了。
4、使用cudnn