
如果你只是想进行测试,那么这个步骤不是必须的,因为我已经在Docker Hub上准备了一个镜像。这是Dockerfile的全貌:
FROM tensorflow/tensorflow:1.14.0-gpu-py3 LABEL MAINTAINER "Benjamin Tan <benjamintanweihao@gmail.com>" SHELL ["/bin/bash", "-c"] # Set the locale RUN echo 'Acquire {http::Pipeline-Depth "0";};' >> /etc/apt/apt.conf RUN DEBIAN_FRONTEND="noninteractive" RUN apt-get update && apt-get -y install --no-install-recommends locales && locale-gen en_US.UTF-8 ENV LANG en_US.UTF-8 ENV LANGUAGE en_US:en ENV LC_ALL en_US.UTF-8 RUN apt-get install -y --no-install-recommends \ wget \ git \ python3-pip \ openssh-client \ python3-setuptools \ google-perftools && \ rm -rf /var/lib/apt/lists/* # install conda WORKDIR /tmp RUN wget --quiet https://repo.anaconda.com/miniconda/Miniconda3-4.7.12-Linux-x86_64.sh -O ~/miniconda.sh && \ /bin/bash ~/miniconda.sh -b -p /opt/conda && \ rm ~/miniconda.sh && \ ln -s /opt/conda/etc/profile.d/conda.sh /etc/profile.d/conda.sh && \ echo ". /opt/conda/etc/profile.d/conda.sh" >> ~/.bashrc # build conda environments COPY environment.yml /tmp/kubeflow-mnist/conda/ RUN /opt/conda/bin/conda update -n base -c defaults conda RUN /opt/conda/bin/conda env create -f /tmp/kubeflow-mnist/conda/environment.yml RUN /opt/conda/bin/conda clean -afy # Cleanup RUN rm -rf /workspace/{nvidia,docker}-examples && rm -rf /usr/local/nvidia-examples && \ rm /tmp/kubeflow-mnist/conda/environment.yml # switch to the conda environment RUN echo "conda activate kubeflow-mnist" >> ~/.bashrc ENV PATH /opt/conda/envs/kubeflow-mnist/bin:$PATH RUN /opt/conda/bin/activate kubeflow-mnist # make /bin/sh symlink to bash instead of dash: RUN echo "dash dash/sh boolean false" | debconf-set-selections && \ DEBIAN_FRONTEND=noninteractive dpkg-reconfigure dash # Set the new Allocator ENV LD_PRELOAD /usr/lib/x86_64-linux-gnu/libtcmalloc.so.关于Dockerfile值得关注的重要一点是Conda环境是否设置完成并准备就绪。要构建镜像:
% docker build -t your-user-name/kubeflow-mnist . -f Dockerfile % docker push your-user-name/kubeflow-mnist那么,现在让我们来创建第一个组件!
在pipeline.py中可以找到以下代码片段。
Step1:Git Clone在这一步中,我们将从远程的Git代码库中执行一个git clone。特别是,我想要向你展示如何从私有仓库中进行git clone,因为这是大多数企业的项目所在的位置。当然,这也是一个很好的机会来演示Rancher中一个很棒的功能,它能简单地添加诸如SSH密钥之类的密钥。
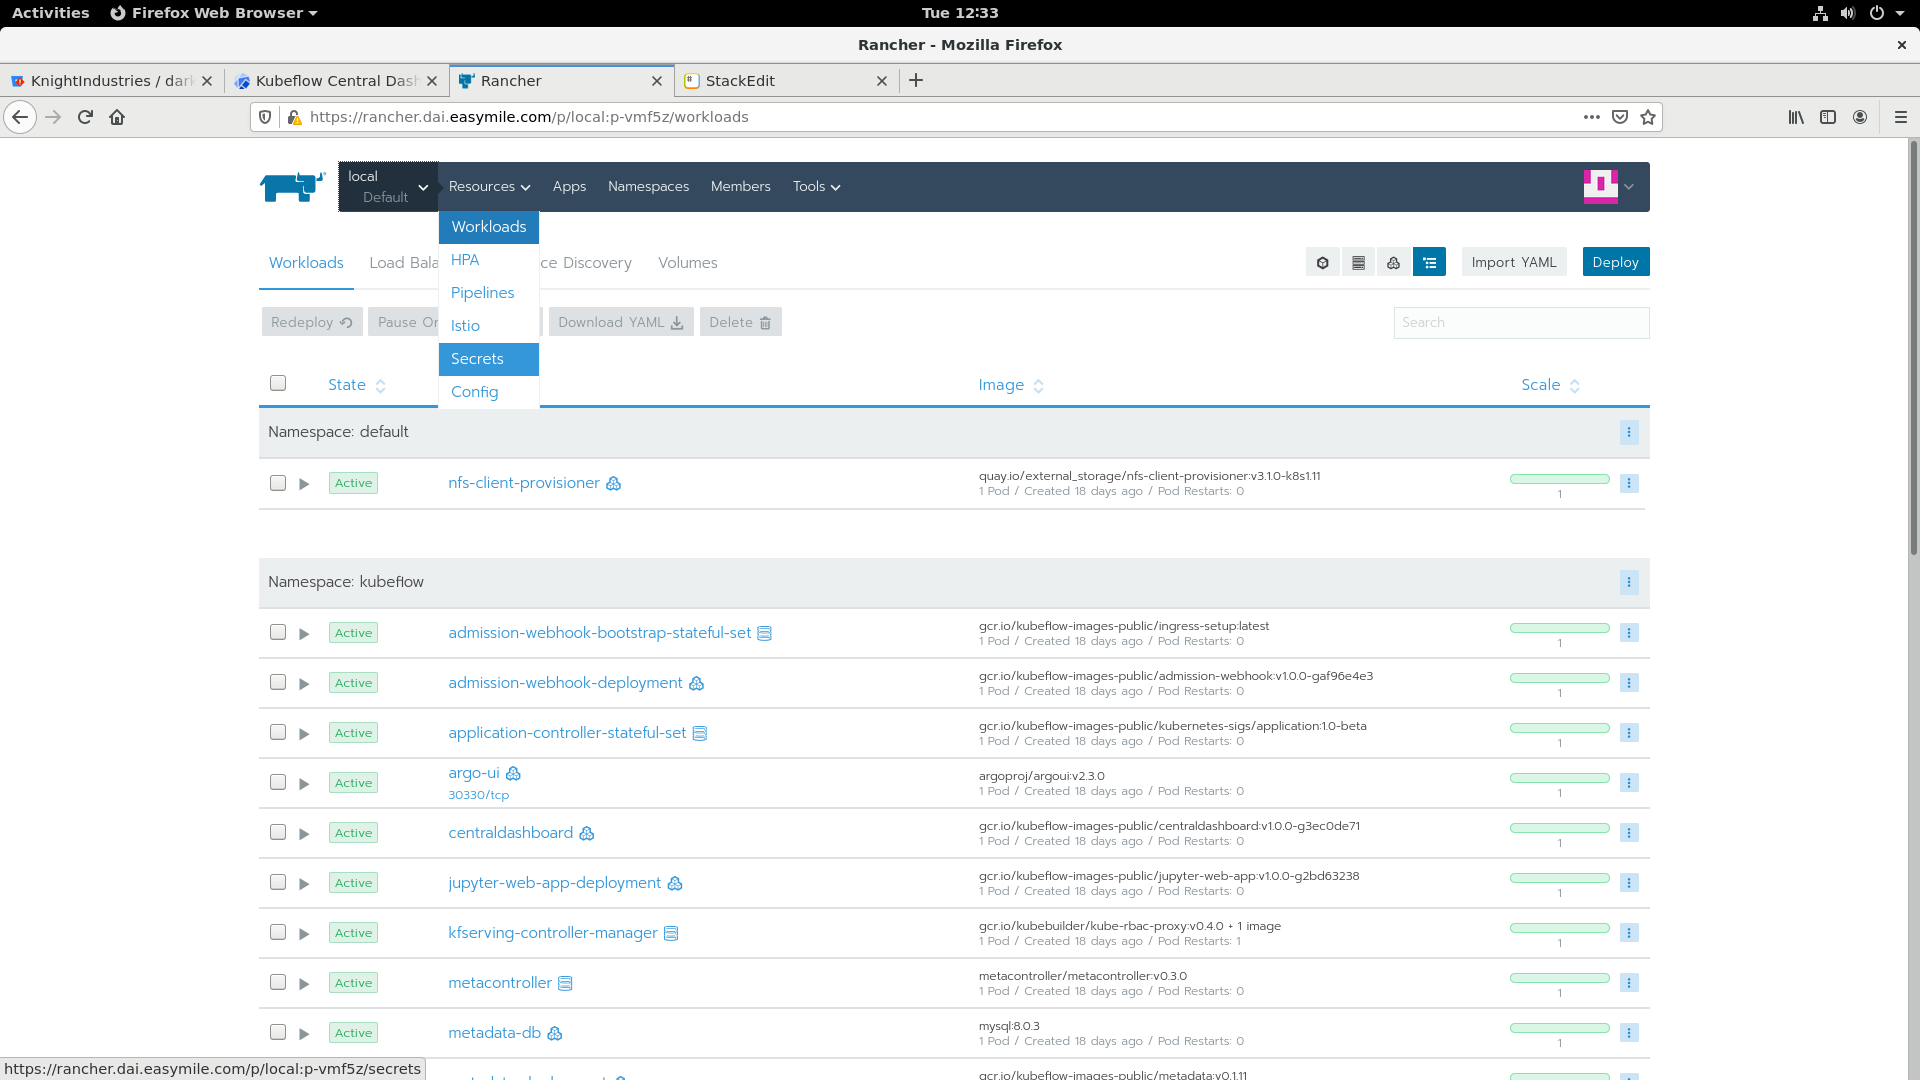
使用Rancher添加密钥访问Rancher界面。在左上角,选择local,然后选择二级菜单的Default:

然后,选择Resources下的Secrets
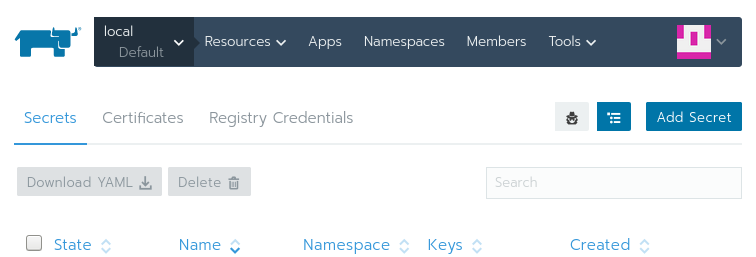
你应该看到一个密钥的列表,它们正在被你刚刚选择的集群所使用。点击Add Secret:
使用你在下图中所看到的值来填写该页面。如果kubeflow没有在命名空间栏下展示出来,你可以通过选择Add to a new namespace并且输入kubeflow简单地创建一个。
确保Scope仅是个命名空间。如果将Scope设置为所有命名空间,那么将使得在Default项目中的任意工作负载都能够使用你的ssh密钥。
在Secret Values中,key是id_rsa,值是id_rsa的内容。完成之后,点击Save。
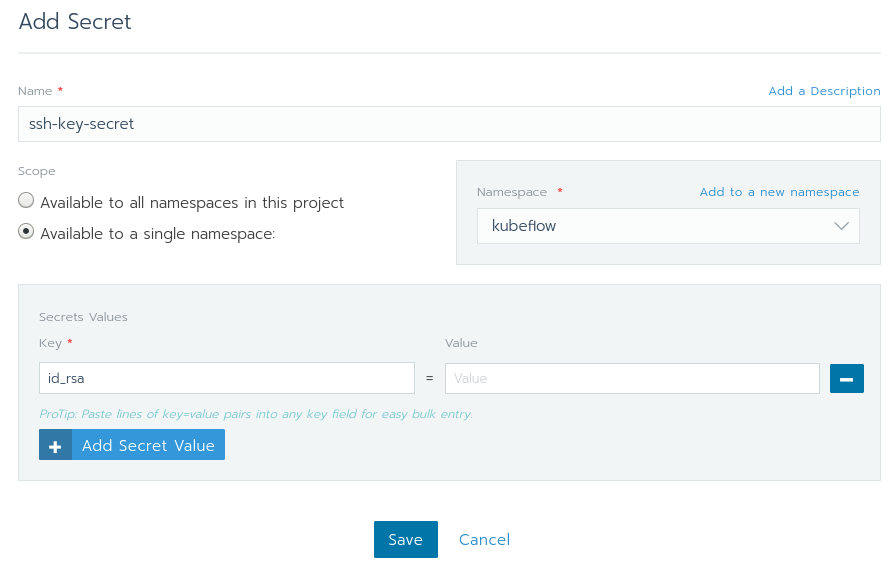
如果一些进展顺利,你将会看到下图的内容。现在你已经成功地在kubeflow命名空间中添加了你的SSH密钥,并且无需使用kubectl!

既然我们已经添加了我们的SSH key,那么是时候回到代码。我们如何利用新添加的SSH密钥来访问私有git仓库?
def git_clone_darkrai_op(repo_url: str): volume_op = dsl.VolumeOp(, resource_name="pipeline-pvc", modes=["ReadWriteOnce"], size="3Gi" ) image = 'alpine/git:latest' commands = [ "mkdir ~/.ssh", "cp /etc/ssh-key/id_rsa ~/.ssh/id_rsa", "chmod 600 ~/.ssh/id_rsa", "ssh-keyscan bitbucket.org >> ~/.ssh/known_hosts", f"git clone {repo_url} {PROJECT_ROOT}", f"cd {PROJECT_ROOT}"] op = dsl.ContainerOp(, image=image, command=['sh'], arguments=['-c', ' && '.join(commands)], container_kwargs={'image_pull_policy': 'IfNotPresent'}, pvolumes={"/workspace": volume_op.volume} ) # Mount Git Secrets op.add_volume(V1Volume(name='ssh-key-volume', secret=V1SecretVolumeSource(secret_name='ssh-key-secret'))) op.add_volume_mount(V1VolumeMount(mount_path='/etc/ssh-key',, read_only=True)) return op