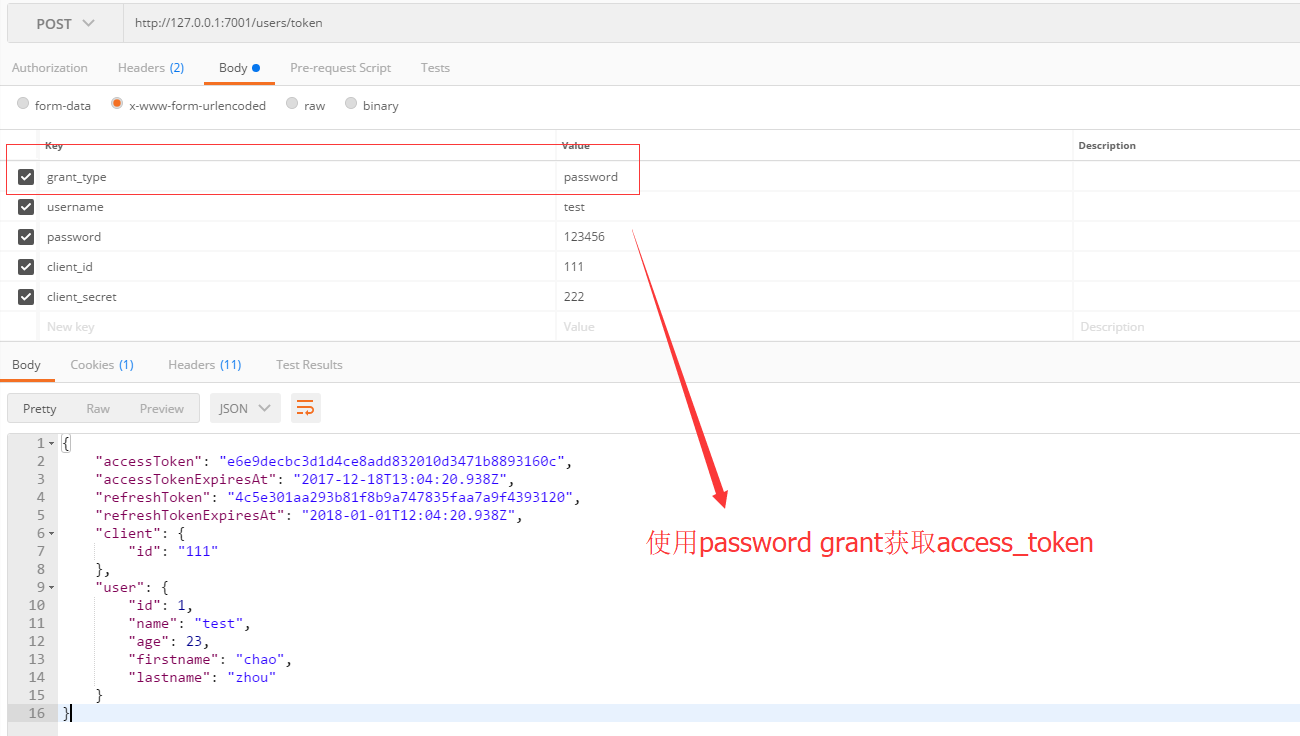
2、密码模式
密码模式,简单地理解即为使用用户名密码等参数获取access_token,它的步骤如下:
- 用户向客户端提供用户名和密码。
- 客户端将用户名和密码发给认证服务器,向后者请求令牌。
- 认证服务器确认无误后,向客户端提供访问令牌。
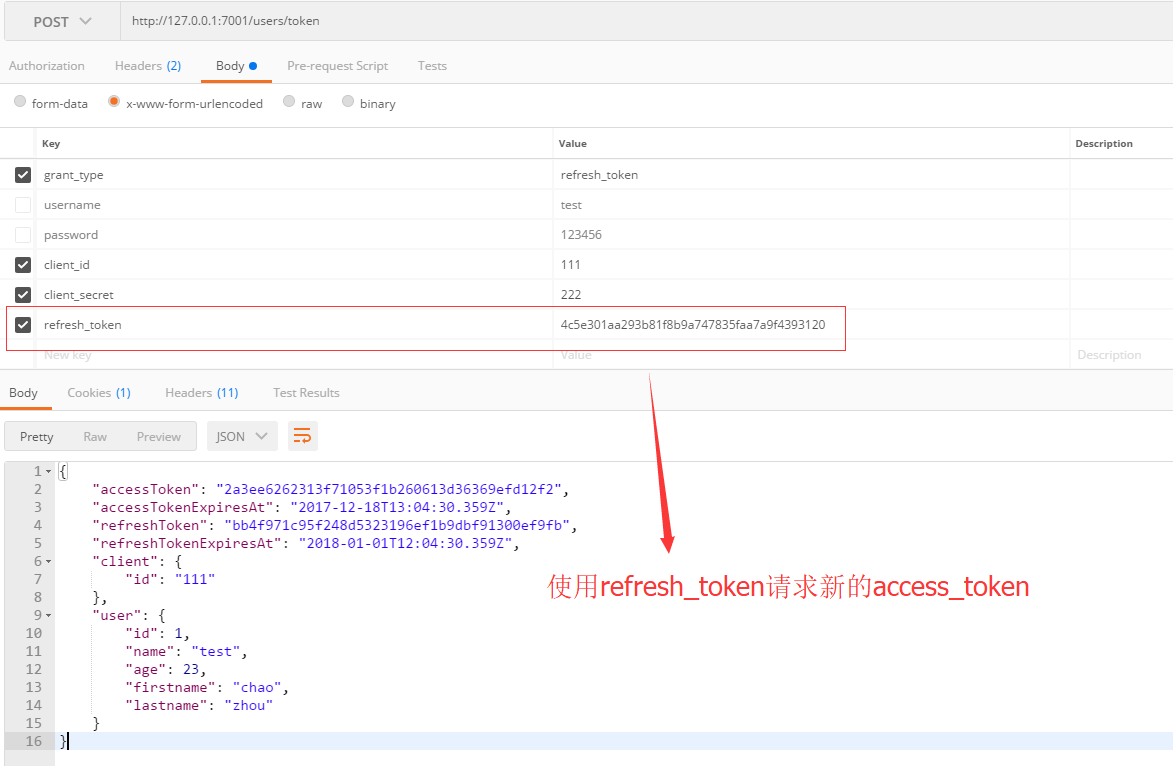
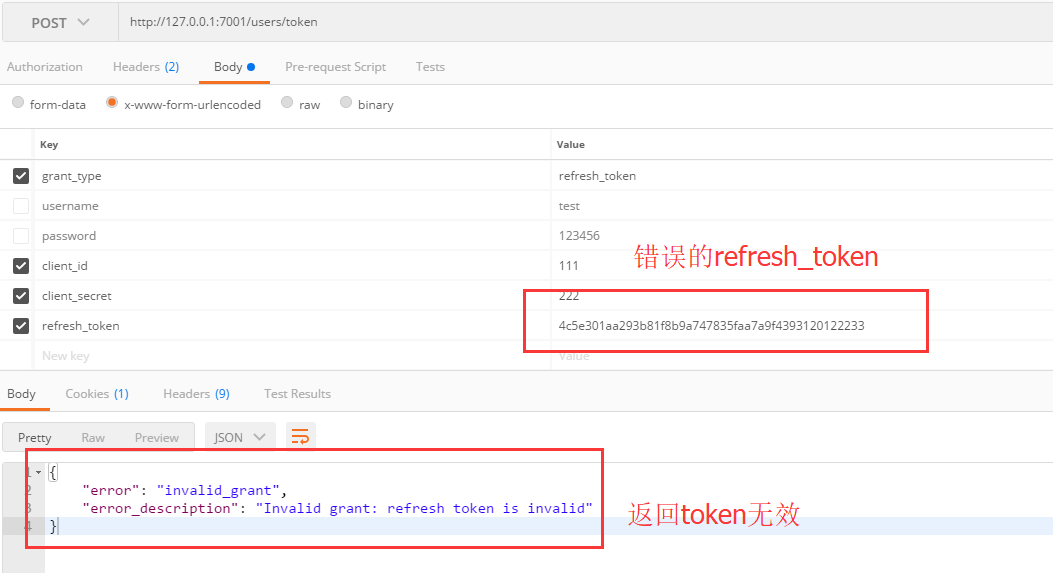
3、refresh_token的应用
refresh_token被用来获取新的access_token和refresh_token,使用方式简单如下:
refresh_token无效:
使用nodejs实现OAuth授权服务
技术栈:
- nodejs + eggjs
- eggjs-oAuth-server插件
具体可以参考:
https://github.com/Azard/egg-oauth2-server
https://cnodejs.org/topic/592b2aedba8670562a40f60b
1、code grant模式测试及单点登录实现
这里我们构建两个站点,一个是7001端口(授权服务),一个是7002端口(客户端),授权模式为code grant。
首先是客户端登录页:
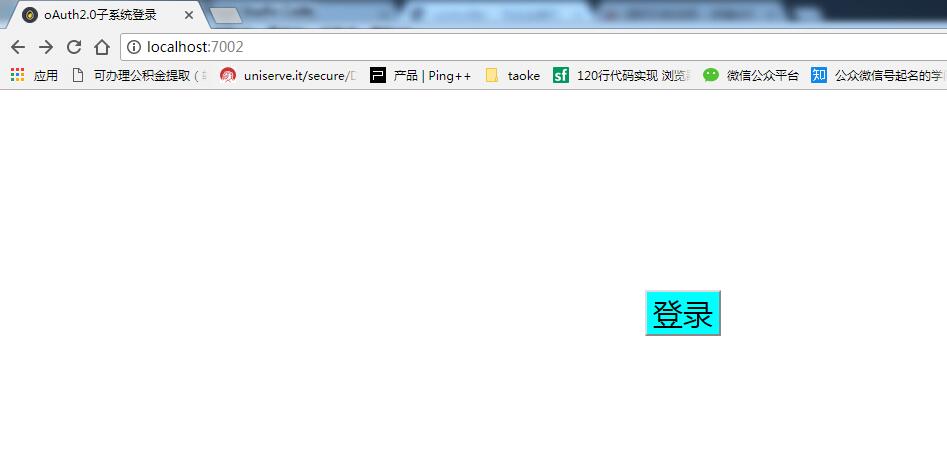
单击按钮后直接登录:
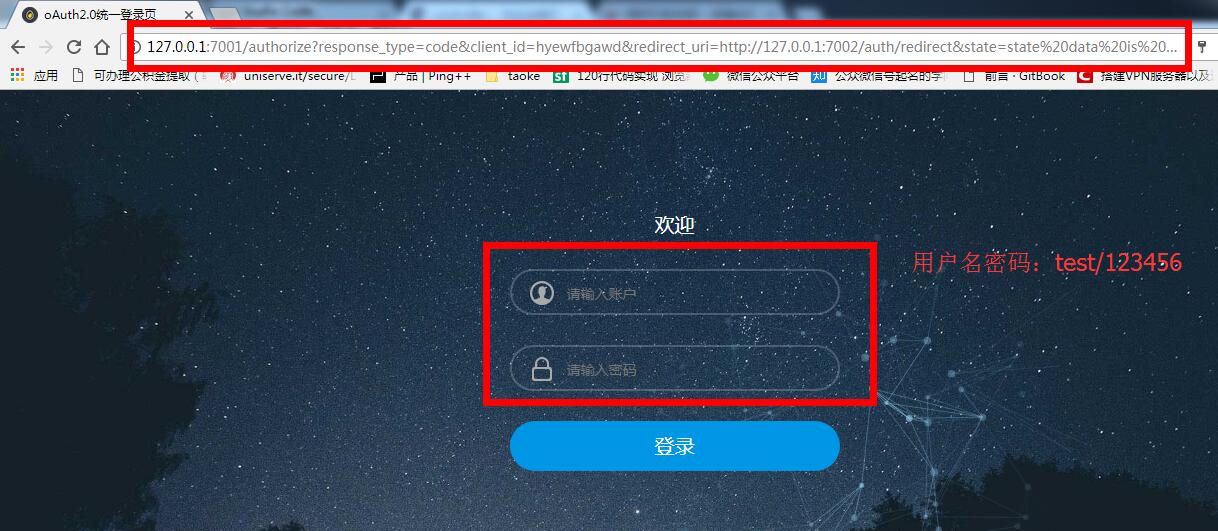
可以发现,浏览器重定向到授权服务地址,并携带了response_type、client_id、redirect_uri三个参数,登录成功后,浏览器会重定向到redirect_uri指定的地址,即这里的*http://127.0.0.1:7002/auth/redirect*:
如下为授权服务的登录页写法
<form action="/oauth2/authorize?{{query}}" id="form1" name="f" method="post">
  <div class="input_outer">
    <span class="u_user"></span>
    <input name="username" class="text" style="color: #FFFFFF !important" type="text" placeholder="请输入账户">
  </div>
  <div class="input_outer">
    <span class="us_uer"></span>
    <input name="password" class="text" style="color: #FFFFFF !important; position:absolute; z-index:100;"value="" type="password" placeholder="请输入密码">
  </div>
  <div class="mb2"><a class="act-but submit" href="javascript:;" rel="external nofollow" onclick="document.getElementById('form1').submit()" style="color: #FFFFFF">登录</a></div>
</form>
内容版权声明:除非注明,否则皆为本站原创文章。